Long-lasting care for your robotic lawnmower
4 steps to a clean and well-maintained robotic lawnmower
Note: For optimal cleaning, it is important to always follow the manufacturer’s instructions, as robotic lawnmowers can differ in terms of their design and handling during cleaning and maintenance.
1. Cleaning the housing
In particular, the hard plastic cover of the robotic lawnmower is permanently exposed to a wide variety of weather conditions, which causes it to deteriorate over time.
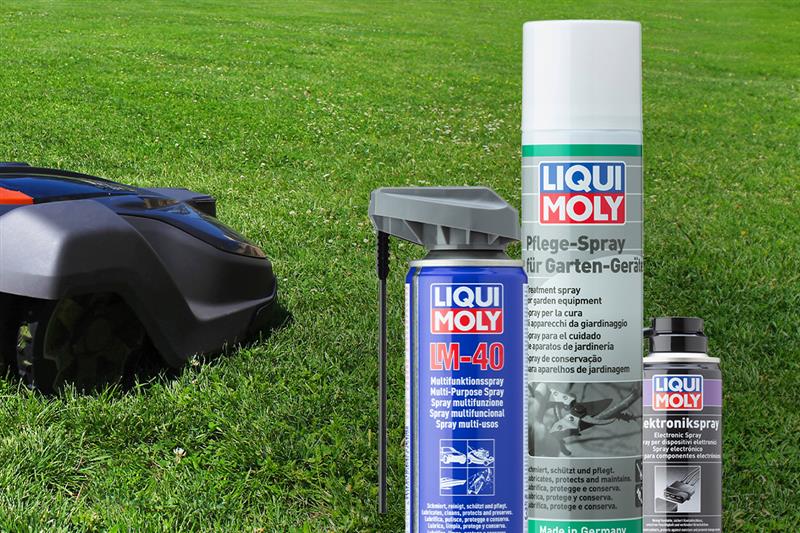
In order to ensure thorough cleaning and in accordance with the manufacturer’s instructions, coarse contamination on the device should be washed off carefully in the first step with the aid of water. Residual water can now be dried off with a Microfiber Cloth. The Robotic Lawnmower Cleaning and Care Spray is ideal for subsequent intensive care. It is used for scratch- and streak-free cleaning and, with regular use, prevents the material from becoming brittle and fading due to UV radiation.
2. Removing the grass clippings
When mowing the lawn, clippings accumulate on the underside of the robot. If these are not removed regularly, they will degrade the performance over time and prevent a consistent cutting result.
To ensure that the desired lawn appearance is maintained over the long term, we also recommend cleaning the underside, spraying it with our Robotic Lawnmower Cleaning and Care Spray and then wiping it clean with a Microfiber Cloth.
Caution: During this work, it is essential to ensure that the power circuit of the robotic lawnmower is disconnected in order to minimize the risk of injury at the cutting unit. You can find all the important information on this in the operating instructions of your robot model.
3. Cleaning the charging contacts
There are model-specific differences in the cleaning of the charging contacts. While the charging contacts of some models clean themselves, others require you to do it yourself. Please refer to the manufacturer’s instructions to find out which category your model falls into.
If the charging contacts of your robotic lawnmower need to be cleaned manually, this should be done regularly. If the contacts are contaminated, the charging process can be inhibited or, in the worst case, interrupted completely.
Do not hold the robot under running water when cleaning the contacts. Instead, simply wipe them with a damp cloth to remove any residues. Some manufacturers also recommend rubbing with fine sandpaper to remove signs of corrosion. The manufacturer’s guidelines can also be used to determine whether this method is suitable for your model. In the last step, the cleaned surface can be sprayed with Electronic Spray. This reduces contact resistance, offers excellent preventive corrosion protection, and displaces moisture. After spraying the contacts, the adjacent plastic areas should be dabbed with a clean cloth.
4. Regular blade replacement and maintenance of the blade disk
Sharp cutting blades are at the heart of the robotic lawnmower and ensure a clean cutting result. For a perfect cut with low energy consumption, they require particularly intensive care. Stones in grass or branches that break off trees and get under the blades will increase wear over time. It is therefore necessary to replace the blades after some time.
When changing the blades, it is important to exercise extreme caution and, ideally, only work with protective gloves. The blades are sharp and the risk of injury is very high. In addition, the electric circuit must be interrupted as a safety precaution. This can usually be done by flipping a small switch. You can find more detailed information about this in your robotic lawnmower’s user manual. The blades and the associated screws must then be replaced as specified in the operating instructions.
The blade disk is the base on which the cutting blades are mounted. This is also heavily stressed by long-term use and the associated environmental influences such as moisture. This can lead to unpleasant squeaking noises. Our LM 40 Multi-Purpose Spray can help here. It also prevents corrosion and has a very good penetration properties, which helps to ensure optimum lubrication at all necessary points.

More exciting articles

- 04/10/2024

- 03/13/2024

- 02/10/2024
- 10/23/2023

- 10/10/2023

- 10/08/2023

- 11/14/2022


